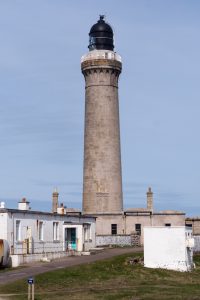
I was back in Scotland just before Easter weekend. On Easter Sunday, mum and I drove west from Glasgow. We stopped at Loch Fyne Oysters where we had breakfast and bought some fresh fish and meat and then Fyne Ales where we bought a 5l mini-cask of they’re very ‘fyne’ Jarl light ale. We had lunch at the Kitchen Garden in Oban before getting the ferry over to Mull and another from Tobermory to Kilchoan on the Ardnamurchan peninsula. The ‘CalMac’ ferry ‘Hopscotch’ saved a much longer drive and the new government subsidised pricing makes attractive as well as scenic and relaxing. From Kilchoan it was a short drive to the lighthouse.
I had booked one of the lighthouse keepers cottages for a few days. [image: Inline images 1] The pink granite blocks from nearby Mull are massive and none of these buildings are likely to change within another several hundred years.
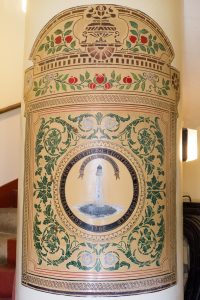
[image: Inline images 2] A beautiful painting on the central pillar at ground level in the doorway. I am quite sure this was painted around 1849 when the lighthouse was built.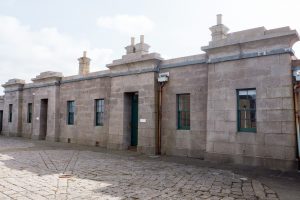
Archive for the ‘me’ Category
Ardnamurchan
Monday, May 8th, 2017The new home is blog.erikbloodaxe.nz
Tuesday, January 17th, 2017Yes, I’ve been bludging my wee bro’s web service provider for years for my blog. A few years ago it suggested I upgrade WordPress, but failed with an error. Every year or so it gets more insistent, but still fails to update. I’ve finally got around to subscribing to my own hosted web server. Took a couple of days to get the ‘erikbloodaxe.nz’ domain registered and another couple of evenings to get the sub-domain setup right and copy across the old blog contents. I’ll endeavour to keep it updated more frequently. One plugin I tried to setup on the old blog site was the ability to email new posts to the blog server, but it never worked. The new blog version will hopefully fix that.
Dreamliner
Saturday, October 24th, 2015Just over a week ago I had my first flight on one of Air New Zealand’s new Boeing 787-9 Dreamliner’s. I had been at a conference in Sydney and flew out back to Auckland mid morning on the Friday. On some flights on this sector AirNZ use long-haul Aircraft, so 777-200/300, or Dreamliner, even though it is a short-haul flight. Just so happened I was on a Dreamliner. On these trans-Tasman and Pacific Islands short-haul routes Air NZ have basic ‘Seat’ and ‘Seat + Bag’ non-changeable options and ‘The Works’ and ‘Works Deluxe’ which are changeable and include food and entertainment in the price. The latter two options put you towards the front of the plane and ‘Deluxe’ guarantees an empty seat next to you on the single aisle Airbus A320. On the Dreamliner, ‘The Works’ puts you at the front of Economy, or in Premium Economy, and ‘Deluxe’ puts you in Business Premiere. I was on a ‘The Works’ ticket, changeable in case of a change of plans which has happened a few times, but I had an Elite short-haul recognition upgrade which bumped me into business. I normally fly long-haul from NZ, so it was nice to be able use a short-haul upgrade for a change. As a frequent flier, you can select your seats online in advance rather than just within the 24 hour online check-in period. So, my first flight on a Dreamliner was in seat ‘1A’.
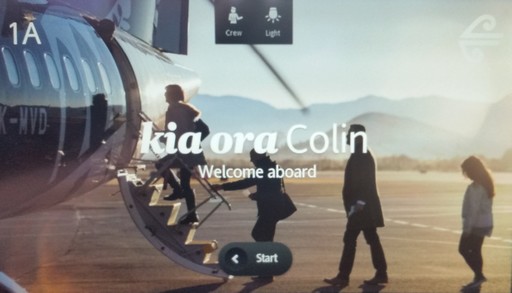
The Business Premiere seats were developed for the 777-300 and then also used in the 747, now out of service with Air NZ, and 777-200 when they were overhauled, and now the Dreamliner. They don’t fit the Dreamliner as well as the other aircraft as it is seemingly a narrower body. Very comfortable nonetheless. Despite being called ‘Works Deluxe’, it is in fact the full Business Premiere service from long-haul. You get linen, crockery, metal cutlery, attentive service and food developed by Peter Gordon and his team – he has 2 or 3 restaurants in both Auckland and London. So, a 3 hour flight was more like a long lunch in a good restaurant, with fabulous food and excellent NZ wines. So, if you’re planning a trans-Tasman or Pacific Island flight with Air New Zealand, I recommend you check out which aircraft are available and book accordingly for a very pleasant experience over the regular bus trip in an appropriately named short-haul Airbus.
Christmas Present 2014
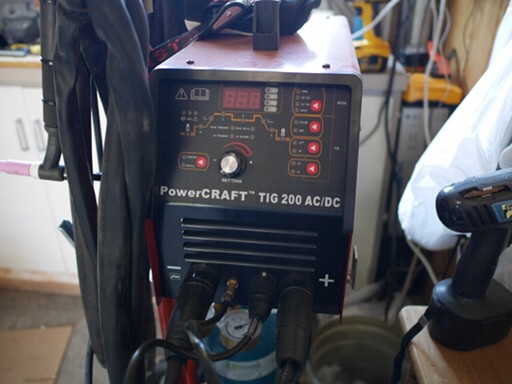
Wednesday, April 15th, 2015My present to myself this last Christmas was a PowerCRAFT TIG 200 AC/DC welder. It’s made by Lincoln Electric, one of the big US welder manufacturers. They are clearly competing against the widely available cheap Chinese welders and, whilst it is using their technology, it is manufactured in China. It can weld steel and stainless steel, as well as aluminium, magnesium, titanium and zinc, probably more.
Bike-lift cum work bench/welding table.
Monday, January 26th, 2015Wow, over 2 years since my last post. Every so often, probably every few months, work becomes busier than ever, but it never gets less busy, so that’s the new norm until it gets busier again…
Anyway, my knees are not so good after years of crawling around on rocks manhandling seals when we were tagging them. I always take kneepads on the rare occasions I get into the field now. That also means I’m done with crawling around on my knees servicing my motorbikes, so I built a multipurpose bike-lift/workbench from scratch using a cheap trolley jack to lift it. The bench sits at 250mm when lowered and there is a ramp which clips on to run the bike up and down. For bike work it will only be lifted to 400mm, or 500mm, but the bench can be lifted to 900mm and locked at every 100mm increment in between. At 800mm, or 900mm it is a heavy duty bench for engine/gearbox work and a welding bench – earth the bench and for most welding jobs, contact is made through the bench.
It’s been built over a few months inbetween travel, but I’ve finished it during the Xmas/New Year break. I used my landlord’s industrial MIG welder for a lot of the structural stuff, not to mention his vertical milling machine for the precision drilling, as well as his metal bandsaw and guillotine. My Xmas treat to myself was a 200Amp AC/DC TIG welder which has been used to finish the job.
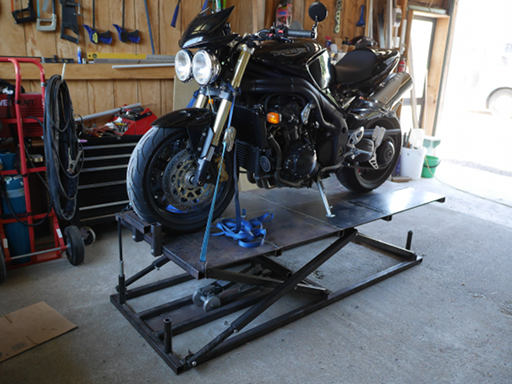
The picture shows the Speed Triple on the lift for a quick service, the ramp only fits when the table is fully lowered.
1,000 km, 2 day trip for a $10 oil-seal
Thursday, October 25th, 2012Wow, over a year since I last blogged. I have travelled a lot and a lot has changed since then. I guess I’ve just been really, really busy and will get to that, but not in this post.
So, I took the RR in for a Warrant of Fitness (WoF) and it failed with a couple of dead bulbs (I hope – haven’t checked yet) and an oil leak all over the nearside rear disk brake – the inner hub seal the only possibility. The WoF fail was on the Thursday afternoon before the Hawkes Bay Anniversary Friday annual holiday and Labour Day on the Monday. On the Friday morning I removed the hub to confirm the damaged seal, but all else intact. Nowhere in Hawkes Bay to buy a new seal until Tuesday being a holiday weekend.
So, the cunning plan. I had intended a trip around the East Cape in the S4 for a while and could get a seal in Gisborne (different region, no Friday holiday) if I was early enough. So, ‘carpe diem’. I booked accommodation in Gisborne and Opotiki online. I arrived in the nick of time in Gisborne to buy the $10 oil-seal from Eastland Bearings. I stayed at the Portside Hotel which I would definitely recommend. May be pricey at peak season, but it is quality accommodation.
Saturday proved to be as good as forecast, barely a cloud in the sky. I headed off first thing around the East Cape. A quick photo op’ at the Tolaga Bay wharf and then a breakfast at the Uawa Cafe, part of the amazing old Tolaga Bay Inn dating back to 1890.

The 600 m long Tolaga Bay Wharf
Next stop the East Cape lighthouse. An hour and a half of incredible twisty roads, virtually no traffic and not a cloud in the sky – doesn’t get much better. I had recently fitted 18″ wheels with Bridgestone Potenza RE002 tyres to replace the worn out imported Yokohama tyres on 19″ x 8.5″ wheels fitted when I bought the Audi a couple of years ago. 18″ x 8″ is the original size, and whilst not filling out the S4’s stretched guards as pleasingly as the previous combination, the taller profile tyres and rims within the width of the tyres is more practical and comfortable. And I must say ‘wow’! The grip is incredible, grippier than a grippy thing. To quote Clarkson and co. on Top Gear, it felt like my face was going to slide off. I’m sure my shiny new Samsung Galaxy S3 can measure the G-force and I’ll try that later. Definitely a huge improvement on the previous tyres. It was then a 20 km drive on a mostly unsealed road from State Highway 35 to the East Cape.
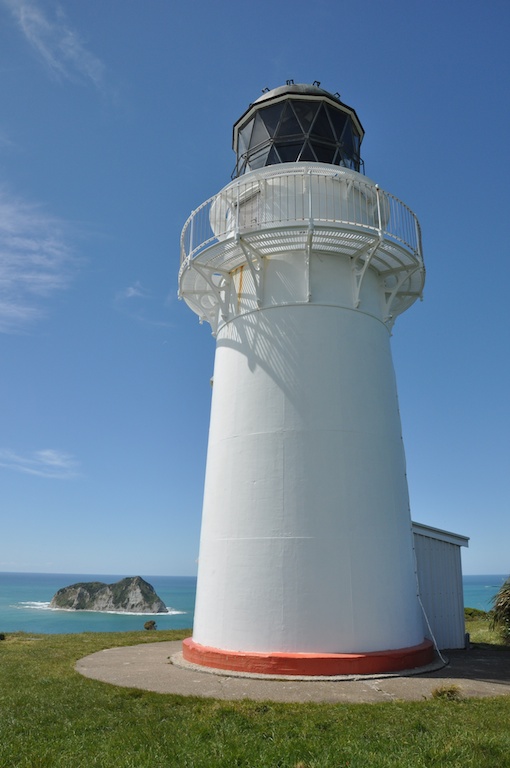
The East Cape lighthouse with the equally excitingly named East Island in the background
God I’m unfit! Thankfully there was an old couple and a family who were clearly not used to any exertion on the 144 m climb to make me feel better. I had to stop and rest four or five times on the way up – to be fair it wasn’t a path but wooden steps most of the way and these were longer and taller than your average step, so much harder than taking small steps. Anyway, I started after the others, overtook them on the way up. I took a few photo’s and enjoyed the view whilst catching my breath.
Next I headed to Opotiki where I stayed the night in a B&B. As forecast it had started raining by the Sunday morning. After a cup of tea and slice of toast I headed South through the Waioeka Gorge to Gisborne. Raining all the way through the gorge, but dried up towards Gisborne. I’m still amazed at the grip the new tyres provided in the wet. Didn’t manage to get the electronic stability control to kick in despite trying quite hard on a few corners – out of academic interest of course. Fuelled up and had a great brunch at the Cafe Ruba. Took the inland route from Gisborne to Wairoa, I think I saw two cars and it was a fantastic twisty road. From Wairoa back to Havelock North was fairly slow going with quite a bit of traffic. Great weekend away and spent acouple of hours fittingthe $10 oil seal when I got back.
In and around Queenstown with ‘Big Ed’
Wednesday, June 15th, 2011In May, my old friend Ed was in Queenstown for a conference. Ed and Clare considered bringing the two kids down, but they’re too young to appreciate or remember it and it’s a hell of a journey from the UK, so Ed came on his own. Given the time available, it was simpler for me to fly down to Queenstown for a long weekend. I arrived on the Friday morning at about 9.30 after the red-eye out of Napier at 6.40 am. I picked up a hire-car and then Ed from his hotel in Queenstown. After a quick cafe stop for me to get a late breakfast – short connections, no chance flying down – we went to explore around Queestown. We stopped at the ‘Shotover Jet’ and watched that. It’s hellish expensive at $120 for about 10 mins (they claim something like 20 mins, but there’s a lot of briefing time. We decided to skip that and look at the Dart River jet trip the next day. Anyway, we headed up the hill from Arthurs Point towards Arrowtown, but curiosity took us up the road to Coronet Peak and Skippers Canyon. The sign saying ‘rental cars may not be insured’ at the entrance to the Skipper’s Canyon road was just too tempting. I took it easy as there were a few rocks scattered around and I didn’t want to damage the underside of the car – god knows what it would cost to recover it.

Impressive and scary drops in Skipper’s Canyon
We passed couple of Landrovers doing a tour at a thankfully suitable part of the track to get past easily. The occupants looked suitably ripped off realising the track was far from rugged enough to stop a Ford Focus. There were sections that would clearly flood over at the slightest hint of rain though, so don’t be too bold.
We returned to Q’town and had a bite of lunch. We booked to go on the Dart River jetboat safari the next day from Glenorchy. I had booked us into the Glenorchy Hotel that night. We drove there and had a wee snooze, me from a very early start and Ed from a very late night. We had a few beers, a very average dinner, made better only by the Highlanders beating the Hurricanes in Invercargill.
After a lazy Saturday morning snoozing to the sound of rain on the roof we went for breakfast at the wonderful Glenorchy Cafe down the road. Cool music, great food and great coffee – we both had a second coffee because it was so comfortable. After a walk down to the lake and around a local wetland area we arrived back just in time for the jetboat trip. The bus trip up to ‘Paradise’ near the top of the jetboat trip was great and the driver funny and very informative. We had a wee walk through the woods to the pickup point. We maneuvered to the back so we would hopefully get to sit in the front of the boat, all the others filing forward like sheep, but we needn’t have worried, the driver told Ed he would only have any legroom sitting in the front, so we were in! The trip took us up river for a while and then all the way back to Glenorchy, about one and a half hours. At speeds of up to 85 km/h it was an awesome ride! These guys really know the river, the boats just scraping the gravel in the shallow, wide, braided sections of the river.
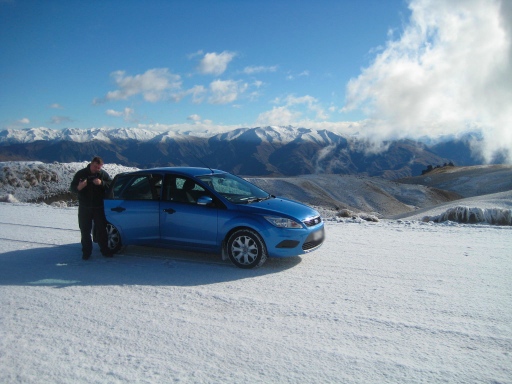
Also not meant to take hire cars up here – 5500ft at Snow Farm Lodge
to be continued…
Home Brewing – No Half Measures!
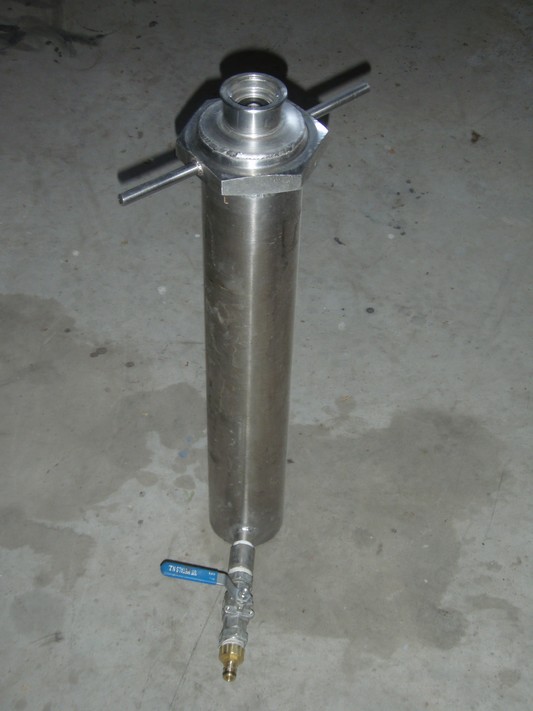
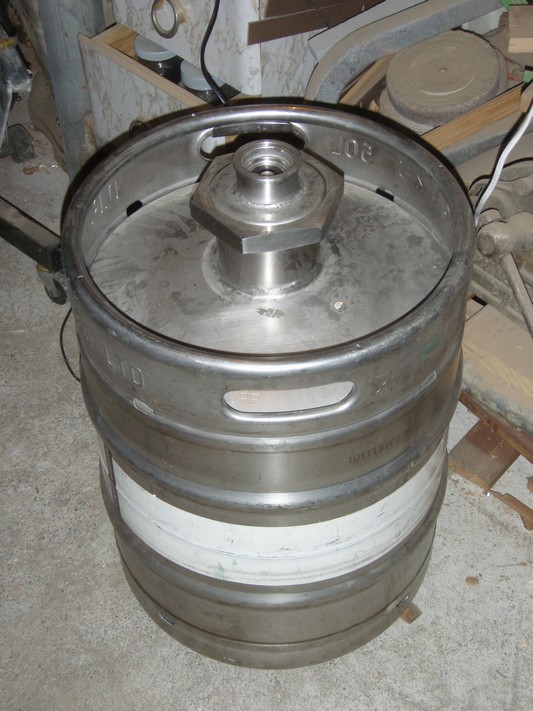
Monday, November 15th, 2010Frog, my neighbour, had to weld a pipe coupling to an old beer keg for someone a while back. This set us thinking and we made some mental notes. Suffice to say, a few months later we had bartered, bought and scrounged some beaten up old stainless steel kegs. Frog has the hoarding gene, passed down through generations of Flanders. Scrap, especially stainless is always reclaimed, so we had enough pipe and couplings to recycle for the job. He set about welding the pipe and couplings into the kegs and I got the rest of the gear together. We decide to start with kits to make sure it was all working and then try from scratch later. I did some research and got a few kits, brewing sugar, sterilising chemicals, thermometer, airlocks and so on. One of the main requirements of brewing is plenty of hot water, so we cut the top out of one keg and welded in a fitting for a 2KW heating element, a sealed tube for a dairy thermostat (up to 120°C, so can boil water) and a fitting for a tap. We lagged the keg to make an effective boiler. We fitted a grate higher than the element so that it can be used for preserving too.

2kW, 50 litre keg boiler. Takes 2 hours to boil. Can be used for crustaceans and preserving too.
OK, so we have hot water for cleaning , dissolving and adjusting the temperature for the yeast. One kit is designed for a brewing bucket of 23 litres, we are using 50 litre kegs, so use two kits. The process is that we warm 2 tins per keg to make it runny. Sterilise the keg, blanking plate, o-ring, bung and airlock. Next the can contents are poured into the keg, the cans rinsed with boiling water also to dilute the syrup and then the brewing sugar poured in and stirred to dissolve. The keg is then topped up with cold, filtered water to almost full. A temperature sensitive label lets you adjust the temperature to between 18°C and 28°C before adding the yeast and stirring a little. Now we fit the sterilised o-ring, blanking cap (with hole), bung and airlock with filtered water.
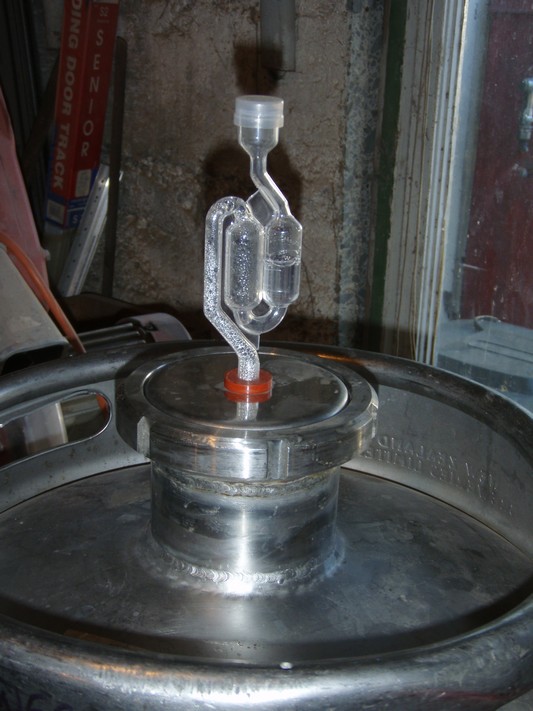
Keg with 100mm coupling fitted with blanking plate, bung and airlock.
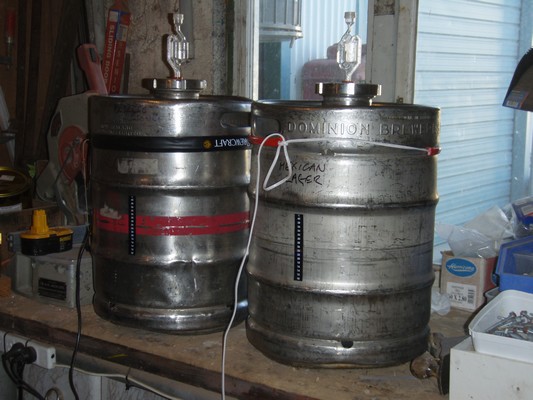
100 litres of beer brewing for the Christmas and New Year holiday period.
The instructions state 4 to 7 days between 18°C and 28°C. I’ve aimed at the lower end of this scale, 20°C to 22°C. Rather than measure the S.G. (Specific Gravity) I simply wait until the the fermentation has just about stopped which typically takes at least 7 to 10 days. At this stage, the beauty of the keg over bottling is that it’s a lot less hassle. Using the pipe cleaning set up the pick-up pipe and coupling can be sterilised and rinsed. Normally a teaspoon, or 5g, of white sugar is used per bottle. I remove the blanking cap and airlock, add around 350g of caster sugar straight to the keg, stir with the pick-up pipe, or a sterile spoon and then seal up and tighten the lid/pick-up/keg-coupling good and tight to withstand the carbonation pressure. Next keep at 20°C or more for a further 4 or 5 days to complete the secondary fermentation.
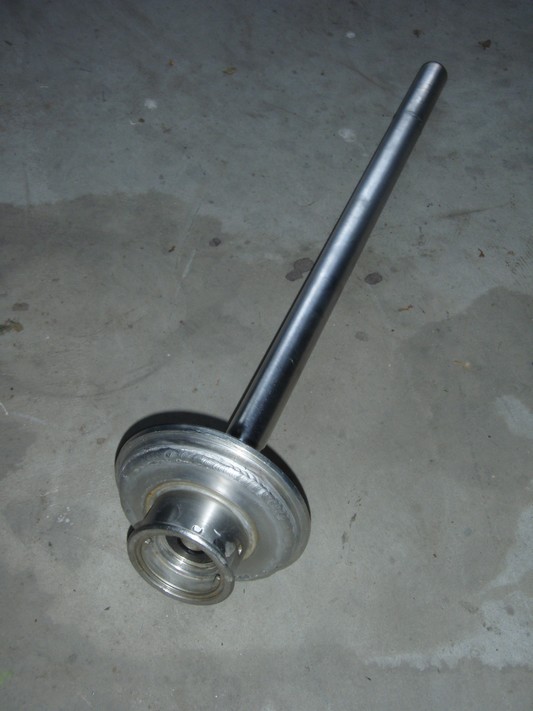
The coupling welded into a blanking lid and the pick-up tube extended to allow for the new neck on the keg.
The cleaning set up can clean the keg pick-up/coupling and the pipe and tap for pouring.
50l of East India Pale Ale from kits from Black Rock maturing.
Immediately after second fermentation the beer can be drunk, but it is better to let it mature for a few weeks, or even months in a cool place.
At least for the lager/pilsener beer it needs to be chilled, especially for a New Zealand summer, so Frog plumbed an old fridge freezer to chill and pour the beer.
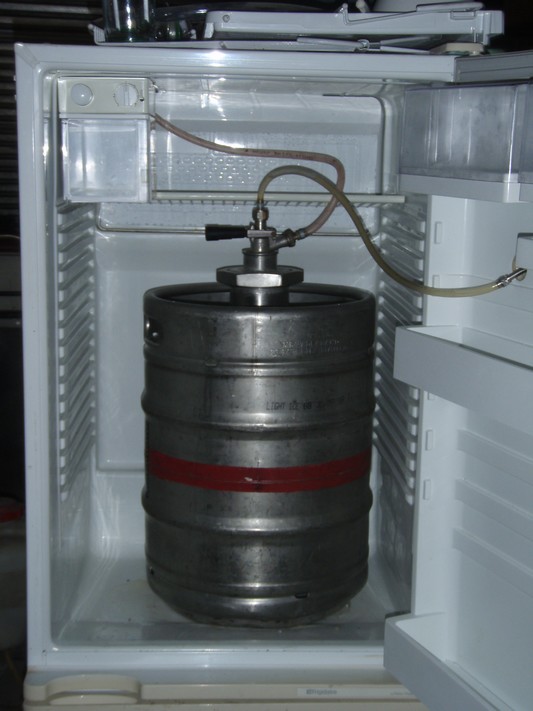
Beer in fridge …
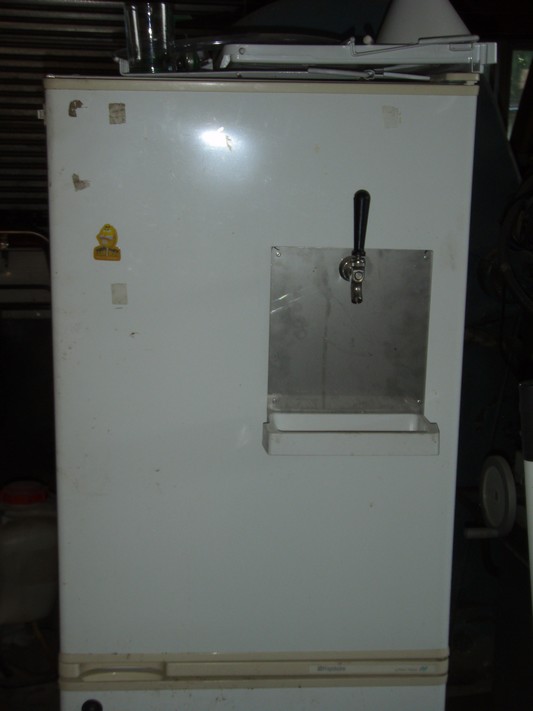
… tap on fridge …
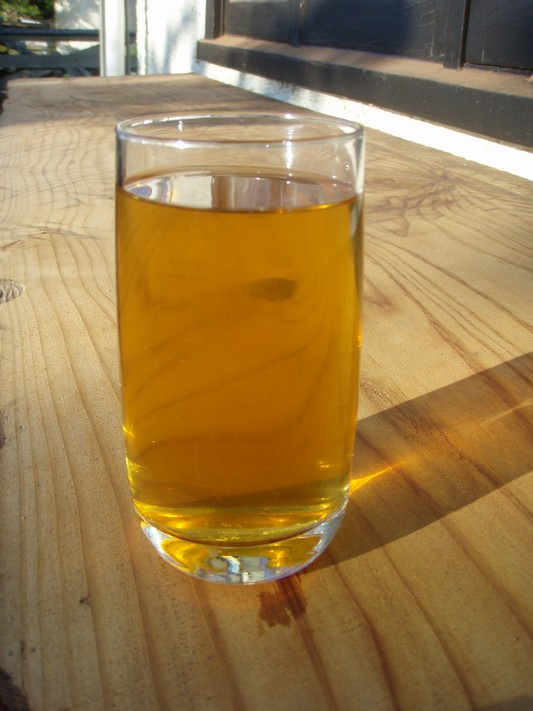
… crystal-clear, refreshing, cold beer in glass – happy days!
Is it worth the effort? Well, it costs about 1/4 of the price of 330ml bottles, stubbies, and we’re not even trying to source the ingredients at a better price or in bulk yet. No non-recyclable glass bottles to dispose of. Also, Frog assures me he doesn’t get the acid reflux he gets with some of the commercial brews. A wee bit of planning, a bit of prep a couple of hours in advance and about an hour of work – enjoyable and satisfying too!
Nelson and Golden Bay
Thursday, November 11th, 2010A couple of weeks ago I traveled to Wellington and then Nelson with a colleague, Chris, from work. We had meetings with DOC (Department of Conservation) in both cities. After our meeting in Nelson on Friday morning we drove down to St Arnaud beside Lake Rotoiti in Nelson Lakes National Park.
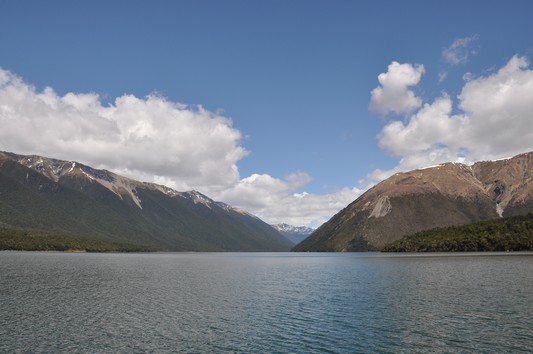
Lake Rotoiti, Nelson Lakes National Park.
If your hovercraft needs topping up with eels then Lake Rotoiti is not the place!
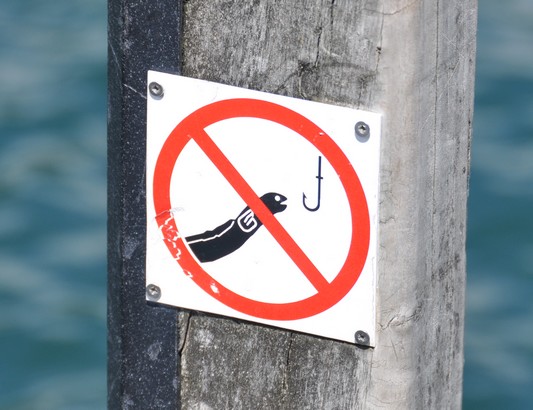
It would be like shooting fish in a barrel.
I dropped Chris off at the airport later that afternoon. I checked in to the Custom House backpackers hostel that night which was exactly what it said on the tin. I had a great meal on Friday night at the Boat Shed Cafe, a Nelson institution.
On Saturday morning I had breakfast at Lambrettas cafe, another Nelson institution and definitely recommended.
I was a little disappointed it was cloudy when the forecast was for clear skies. I then drove to Motueka, a wee bit inland and up, up, up. The gravel track up to Flora Saddle carpark is a cracker. There are sections that are seriously steep, steep enough that an aggressive approach was required in a little front wheel drive rental car. There were pitches where I was trying to maintain some speed, but was getting slower as the front wheels were struggling for traction until the gradient eased a bit. Fun, but not for the faint-hearted when you see the drop-offs at the side of the track. A good friend recommended walking here and he was right. Starting at over 900m, well above the low cloud below, it was brilliantly clear and sunny.
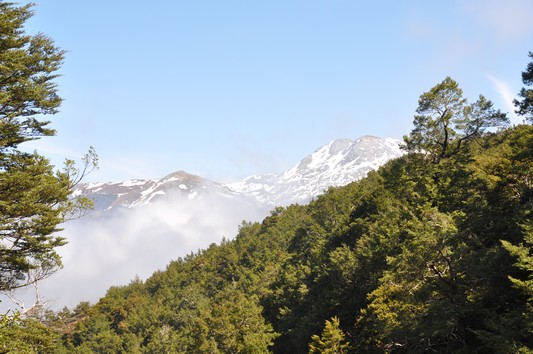
The splendid view from just below the Flora Saddle.
I walked part of the Flora Track, past the Flora Hut and on to the Gridiron Rock Shelters, the site of one of NZ’s gold-rushes.
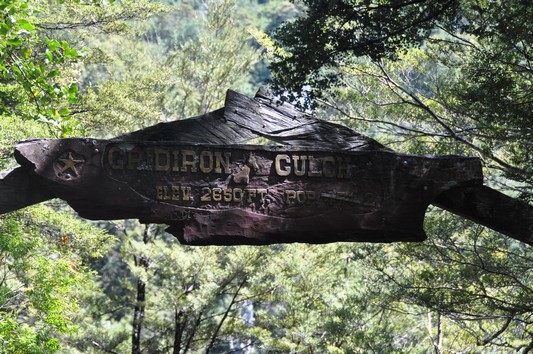
Gridiron Gulch sign tilts to the gold-rush history, used to be a population of 471 apparently.
The Upper Gridiron Shelter has a hut with bunks and a fire-pit outside. The Lower Gridiron Shelter is alfresco but looks like a cool place to spend a night.
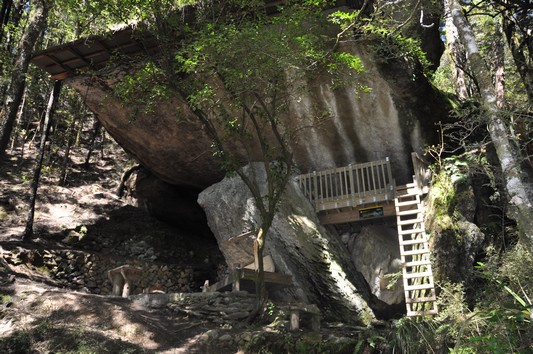
Lower Gridiron Rock Shelter
A 15km round-trip, not particularly challenging, but stunning scenery and interesting history.
I had booked a night in a cottage at the Eatery on the Rock, just outside Takaka, the hub of Golden Bay. From Motueka there is the amazingly tortuous Takaka hill road over to Golden Bay. I thoroughly enjoyed driving my little rental car like I stole it. You can have a lot of fun in the smallest rental car on a really twisty road and you’re nowhere near the speed limit! Whilst enjoyable in a wee hire car, it would be fun beyond description on two wheels – it could outdo the amazingly twisty road I traversed on a rental VFR800 in the Sierra Nevada’s a couple of years ago – even if that topped out at 11,000 ft compared to less than 3000 ft on the Takaka hill road.
The weather forecast for the Sunday was appalling, so I explored as far as I could that evening. Golden Bay is a beautiful area and I will definitely head back on the motorbike, to tramp, or to get on, or in the water. I had a great dinner, the pan-fried deep-sea dory was cooked to perfection. Overnight the weather did turn to poo as forecast. It was absolutely chucking it down, so I headed straight back to Nelson and managed to get an earlier flight home to Hawkes Bay.
First trip in the GT car – The Wairarapa
Thursday, September 2nd, 2010I left work at 1630 on Friday and drove to Martinborough where I had booked a b&b for the night. Arrived at 1930 and enjoyed a glass of wine with the host and a couple of friends, very civilised. 5 minutes walk to the town centre and watched some of the rugby league match on the TV over a beer, but too busy and noisy for eating. Settled on ‘Est’ over the road from the hotel and had an excellent meal with a very nice glass or two of local gewurtz.
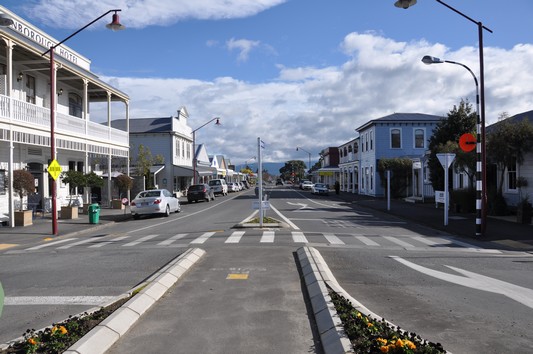
Martinbourgh main drag, cool old ‘Western’ style wooden buildings.
A nice breakfast of scrambled eggs on toast with a couple of rashers and a great conversation with the host, a retired wildlife documentary maker who had been to the NZ sub-antarctic islands. Went for a drive to look at the wineries around the town and then back to the centre for a wander around. After a coffee I headed South to Lake Ferry – yes, used to be a ferry over a lake.
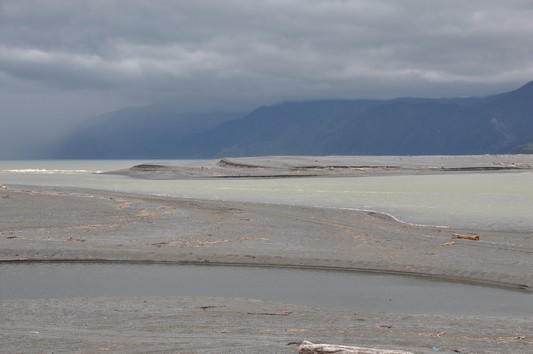
Looking North from Lake Ferry.
After a nice, if a bit too soggy fish and chips (tip: salt your wet fish to dry and firm it up a bit before rinsing, battering and frying) at the Lake Ferry Hotel I headed down to Palliser Bay, the fishing community of Ngawi and Cape Palliser. Two things of interest at Cape Palliser, the New Zealand fur seal colony and lighthouse.
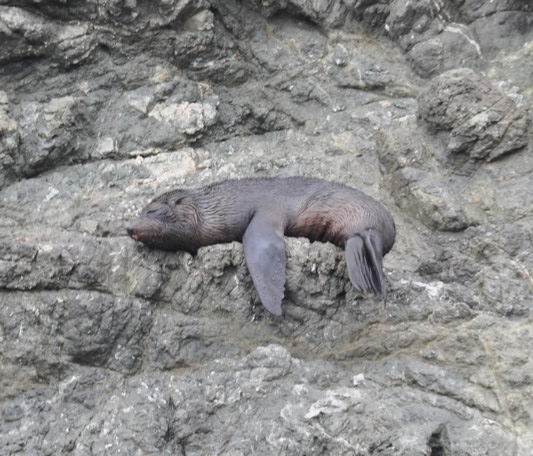
New Zealand fur seal at Cape Palliser

Cape Palliser lighthouse at the top of more than 250 steps.
Then back to Ngawi, the town with more bulldozers per head than anywhere else on Earth – apparently.
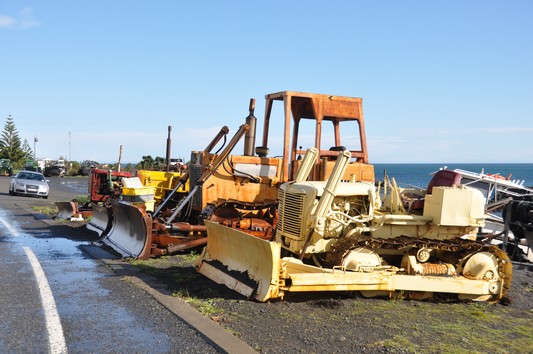
A very few of those on offer with the S4 in the background.
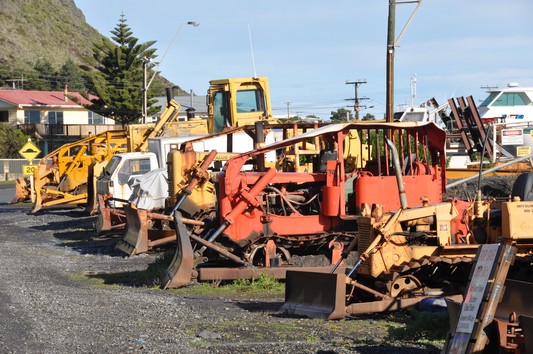
There is also a pink one – called ‘Babe’
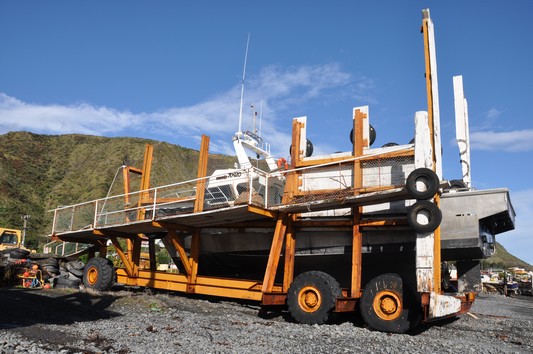
A serious bit of hardware, a commercial boat and mobile dock shifted by a massive ‘dozer
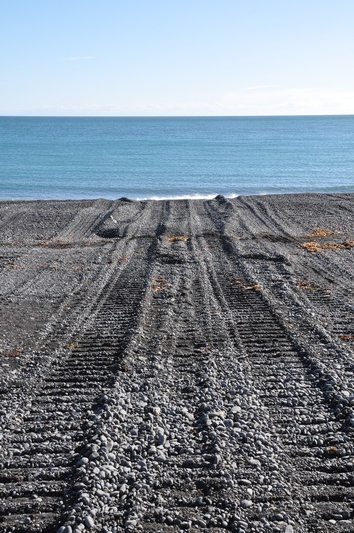
The tracks of said outfit down the increasingly steep shingle beach
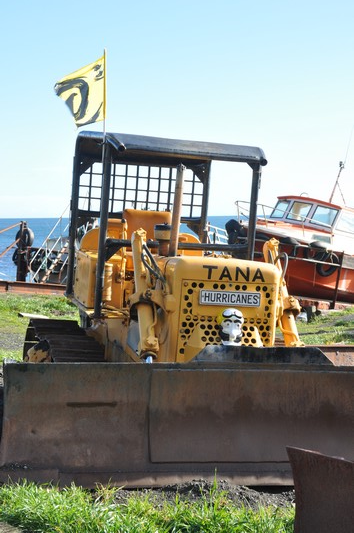
A fan of the local All Black and Hurricanes star Tana Umaga
After Ngawi I headed back North a bit to Kawakawa Station and my accommodation for the night. I had booked their cottage and dinner with the hosts.
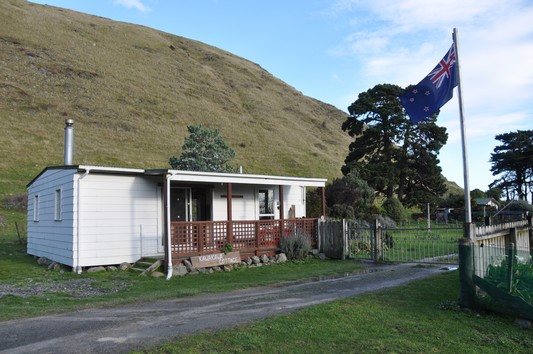
The cottage
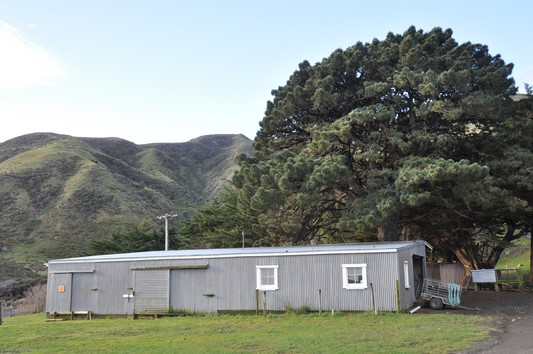
5000 acres of seriously steep country run with sheep and Angus cattle, worked mainly on foot and horse with quad bike where possible
Dinner was a delicious Angus beef and venison (wild kill on the station) pie. For breakfast I had home baked bread and eggs from the farm chooks, so scrambled eggs on toast. Very pleasant and relaxing night. On the Sunday I headed back North to Hawkes Bay and home sticking to the back roads until Masterton.
The next trip is likely to be to the ‘naki, Taranaki, over Labour day weekend. After that the East Cape either by bike, or S4 when the Pohutukawas’ are in bloom.